NetSuite is a highly configurable system. Users can setup their personal settings according to the way they prefer to work. Administrators configure the company settings to customize the system according to their company business processes.
In this series of posts we are providing simple steps to customize NetSuite to better meet the unique needs of your business.

Custom Fields:
Netsuite has a number of standard fields but you may find that there is other business information you would like to track in the system. To accommodate this, you can define custom fields for specific objects in NetSuite.
If you need to add some more additional information which is not possible with the standard NetSuite fields, then you can create custom fields to extend the standard NetSuite forms to track additional information.
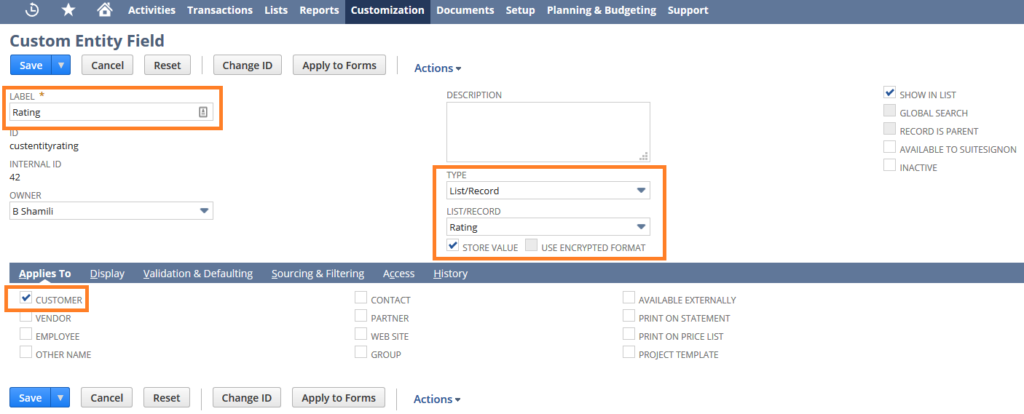
In this example we will show steps to create a custom field on the Customer form to define the customer Rating.
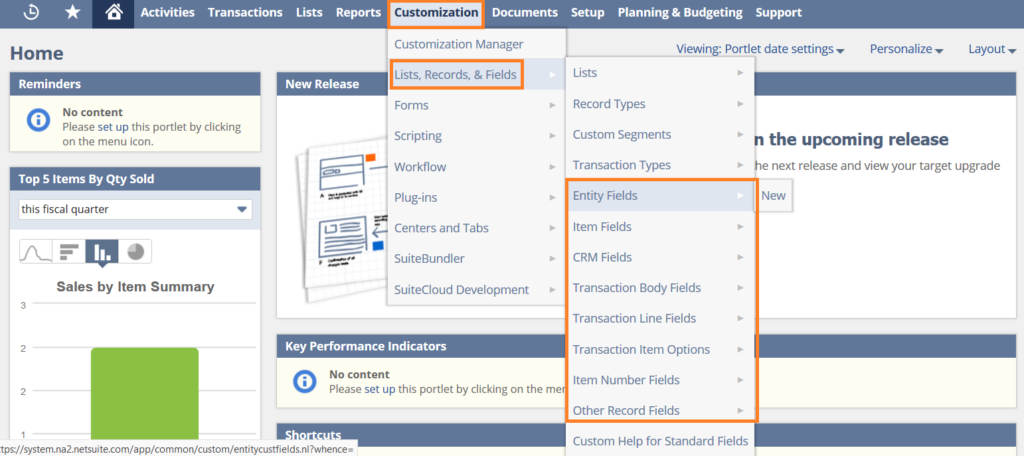
Step 1: Go to Customization > Lists, Records & Fields > Entity Fields > New.

Step 2: In the Label field, enter a name or description for the field that is meaningful to your users. You can enter up to 200 characters for the label. However, you should consider how a long label will appear on pages and printed forms. This will be displayed on the User screen for the transactions you select.

Step 3: Enter a unique ID for the field. To identify the location and purpose of the custom field, establish a naming convention such as using an underscore followed by the field name. For example, all custom CRM fields would result in a name custevent_fieldname.
The field is an alphanumeric string where we can enter up to 30 characters long. NetSuite automatically modifies the ID entered into the field with a prefix that corresponds to the type of field being created as listed below.
- CRM: custevent
- Entities: custentity
- Items: custitem
- Record: custrecord
- Sublist: custrecord
- Transaction Body: custbody
- Transaction Column: custcol
Step 4 : Specify the data type of the field.
Netsuite is providing the following Data Types:
- Check Box
- Currency
- Date
- Date/Time
- Decimal Number
- Document
- Email Address
- Free-Form Text
- Help
- Hyperlink
- Image
- Inline HTML
- Integer Number
- List/Record
- Long Text
- Multiple Select
- Password
- Percent
- Phone Number
- Rich Text
- Text Area
- Time Of Day
Step 5 – Select the owner of the field. By default, this field is set to the currently logged-in user. And, only the owner can modify the record.
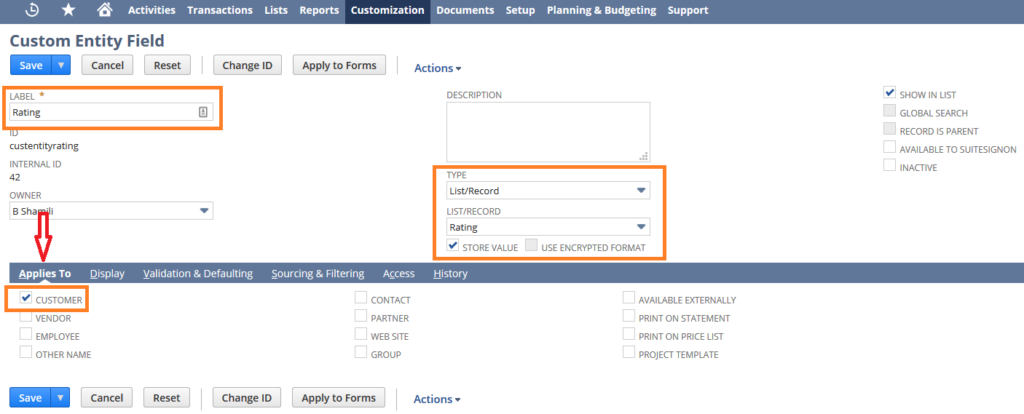
Step 6 – Select the form which you need to apply this custom field.


 “NS Success” is the NetSuite Consulting Practice of Dhruvsoft Services Private Limited – a leading NetSuite Solution Provider Partner from India – providing services worldwide …